Sunday 15 November 2015

Ferris Wheel Cheesecake


So, we have two birthdays this week. My boy turns 12 tomorrow and on Tuesday I turn...well let's just say my 21st was some time ago.

I decided to do a less traditional cheesecake this year and there could only be one flavour.

Can you tell we're Nutella freaks in this house?
Due to a rather hectic weekend we had a small family tea yesterday to celebrate our birthdays. My Ferris Wheel cheesecake turned out to be a major success and everybody loved it. It was a rather large cake and I thought there would be loads leftover but I was wrong.

Here's how to make it.


Melt 150g of unsalted butter over a medium heat. 


Whizz up 24 Digestive biscuits in a food processor to get very fine crumbs. Add the biscuits to the melted butter and stir well to coat every crumb. 


Put the buttery crumb mixture into a 23cm springform cake tin and press down firmly into the base. Leave to chill in the fridge for ten minutes. 


Weigh out 500g of full fat cream cheese. I always use Philadelphia. Give the soft cheese a beat with a wooden spoon to soften it.
Add 85g of icing sugar and stir in. 
Measure out 300ml of double cream.
Pour the cream into a large mixing bowl and  add 1 teaspoon of vanilla extract.
Whisk the cream and vanilla until soft peaks form...

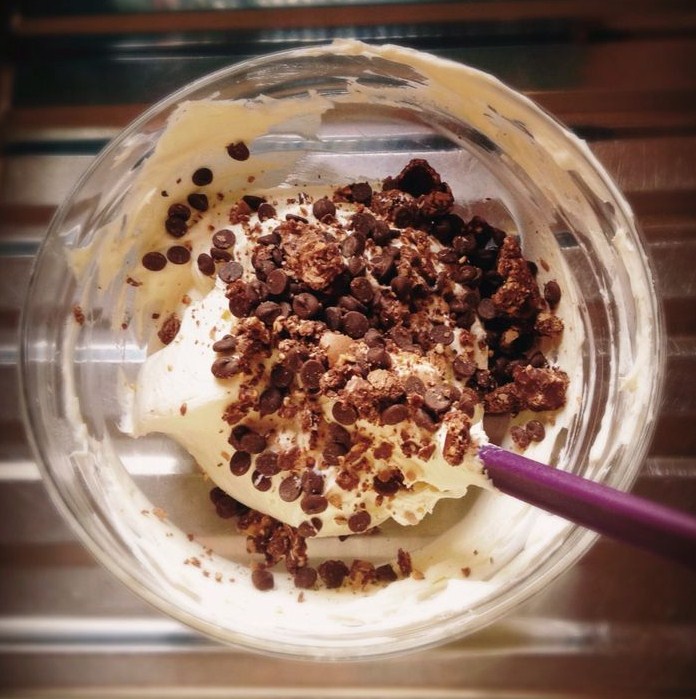
Fold the whipped cream into the soft cheese mixture then add 4 chopped Ferrero Rocher chocolates and 100g of chocolate chips and stir well.


 Spoon over the chilled biscuit base and smooth with a fork.


Chill in the fridge for about 6 hours until set.

When everything has set, put 300g of Nutella in a pan and melt over a low heat until runny.

Anything with Hazel in the name must surely be fab.


Leave the melted spread to cool for a few minutes and then spread it over the top of the cheesecake. I noticed that the Nutella hardens quickly when it hits the cold cheesecake top so act swiftly to get a smooth finish. 

You can decorate your cheesecake any way you like but I wanted mine to resemble a Ferris Wheel so I chose Toffifee chocolates and Ferrero Rocher - 12 of them to represent 12 wonderfully rich and nutty years. I also invested in some of this...Not cheap but worth it for the decadent finish. And there's plenty left for Christmas cookie decoration!

Well, it's not every day you turn 12.
The coloured sweets are supposed to represent the bright lights of the Ferris Wheel.
It's the eyes in case you were wondering. Cheeky rascal.
 
Twelve little chocolates. Twelve happy years.


Back for seconds.

Happy Birthday, Junior. From the minute I knew you existed you have made every day feel like Christmas Day. Sometimes I wonder how it is possible to love someone so much and still be standing. Be happy, stay safe and always be you because you are awesome. I am so proud of how far we have come together. You are my best buddy.

Here is a poem I wrote for you many years ago but it is still so relevant today. I love you more than ever X

My Sleeping Boy

I stare in wonder at my sleeping boy.
How beautiful he is, like an angel or a portrait in oil.
He has kicked off the covers; long limbs strewn across the sheets.
He cuddles Elmoure, a matted dog he cannot sleep without and who I have to wash in secret.

I step over the paraphernalia of childhood, dodging the loose floorboards that may betray my presence.
During the day he is in perpetual motion, a blur of noise and movement.
Time is impossible to freeze so this is my chance to study him; his liquorice lashes, his button nose and the top lip that forms a perfect heart.
He looks like me from the nostrils down.

I touch his clammy hand and his fingers twitch.
For a moment I am transported back to the night he was born,
That first moment we were together but separate for the first time, a flimsy curtain hiding us from the rest of the world.
Just me and him as it has always been.
I watched him then as I watch him now.

I marvelled at those fingers, the way they curled around mine like little worms.
Such perfectly formed nails, like tiny shells.
I remember the surge of untamed love that told me nothing would ever be the same again.

Now he is too big to sit on my knee and I'm not allowed to kiss him at the school gate.
Soon he will be all but lost to me.
I tenderly tuck him in and close the flimsy curtains that hide us from the rest of the world.


Wednesday 4 November 2015

Firework Goodies


The days are slipping past at a rate of knots. One minute it's Halloween and the next it's Bonfire Night! Before we know it it'll be Christmas.

Here are some simple ideas for tomorrow night. Remember, remember the 5th of November!


I'll be back around the middle of November with a more structured blog post - I'm thinking Chocolate Ferris Wheel as it's still a 'Realm of the Lost' theme until we move onto the more Christmassy recipes that accompany 'Bree McCready and the Half Heart Locket'. 

It's Junior's birthday soon and he is a Nutella freak so I'm thinking his birthday cake will be a less traditional cheescake affair this year. You'll have to wait and see. Until then wrap up and have fun!

Chocolate Catherine Wheels


Mmm. I wonder what I'll do with that extra Flake?...
I used ready rolled shortcrust pastry
Crush the Flakes inside their wrapper then sprinkle over
Crispy and sweet
Chocolate Banana Skyrockets


These go in the freezer and are delicious - like chocolate covered ice-cream

Chocolate Sparklers


Orange sparkly Matchmakers dipped in white chocolate and sprinkled with sugar strands

Marshmallow Missiles

Preparation - Marshmallows on sticks & melted chocolate
Decorated with Popping Candy and coloured confetti


Stay safe!

Friday 30 October 2015

Halloween Treats

"Chills in the night air are tingling skin
The veil between worlds is now growing thin
Bright spirits gather, the dead return
Drawn to the flickers where candles burn"
Louise Heyden


Did I scare you? Sorry! But I'm getting into the Halloween spirit. It's tomorrow in case you didn't already know. As promised, here are a few simple goodies which require no baking whatsoever...just a few hours in the kitchen and A LOT of chocolate!

Have a lovely time tomorrow night. Stay safe if you're out Trick or Treating and remember to give your teeth an extra clean before you go to bed.

Mummy lecture over.

These took the longest to make...and the most mess to clear up (at 1 o'clock this morning!)
It's a pretty simple idea but tricky to assemble. Inside these chocolate hats are lots of little sweets - Skittles, chocolate buttons, Smarties etc - so attaching the ice cream cone to the Wagon Wheel base involved some pretty impressive construction skills and lots of patience! To my frustration I discovered that because of a slight slant to the waffle style cone, there was a gap at the bottom of the cone - big enough to allow some of the smaller sweets to spill out. So I had to carefully craft thin strips of Royal icing (luckily I had some ready made stuff to hand) to wrap around the bottom of the cone. I knew this 'patch up job' would be invisible once the chocolate was painted on. 
Once the basic structure was complete it was a case of painting on melted chocolate with a pastry brush then waiting for that to set in the fridge before adding the finishing touches. I'm hoping the final result will be like a Pinata so the kids will bite into the top of the hats to reveal the hidden goodies inside. I won't know for sure how everything has turned out until tomorrow night but I can hear the sweets rattling around inside so that's a good sign. And I'm quite sure these are going to taste amazing.


Again, a very simple idea which looks effective. I used small waffle biscuits for the base but you could use Oreos or even made your own basic cookies. 

I rolled out icing, cut it to size with a cookie cutter then stuck it onto the biscuit base using jam. I used edible writing icing (which I bought from Lakeland) to give a bloodshot effect and Smarties were used to create the different coloured Irises.


These don't require much skill but they're pretty and magical. A nice change to blood and gore! 

I dipped chocolate fingers into melted chocolate  then laid them flat onto greaseproof paper before sprinkling multi-coloured stars on top.

Make a wish!


Cadbury's Mini Rolls are fab at this time of year as you get the kind with green slime jam and raspberry blood inside.

The monster faces were made using white chocolate buttons, mini chocolate beans and black icing. I got the small gummy teeth from Morrisons.


Line up white chocolate fingers along a cooling rack and drizzle over melted white chocolate to create the look of bandages. Use tiny dots of black writing icing for the eyes. 

I love these! 


So, there you have it. Couldn't be simpler really and yet I know the kids are going to love these treats.

I have to confess to having eaten a few 'spare' chocolate fingers and to licking a few bowls over the last couple of days so I will probably not be partaking in the scoffing of any more Halloween goodies. In fact I am craving some homemade soup and fruit! 

Have fun!

Until next time, here is a spooky extract from Bree McCready and the Realm of the Lost, which of course is my inspiration for all these Halloween goodies.

"Bree hit the fresh air with a stitch in her side. Running in the direction of Gillespie Gardens, she hoped that Sandy had made his way back to Freesia House. She slowed when she spotted some children heading her way, dressed for Halloween in ghoulish costumes, shouting 'Trick or Treat!'
Stepping off the pavement to let them pass, she spotted three small figures whizz by on the other side of the road. At first she thought it was another group of children, wearing gruesome masks, but when she looked closer she caught a glimpse of bare, red skin and yellow eyes. Gargoyles."


Sunday 25 October 2015

Toffee Apple Yum Yums


A recipe inspired by Sandy's toffee apple in Bree McCready and the Realm of the Lost

The clocks went back last night. British Summer is officially over, although it has felt that way for some time now. We won't see lighter nights again in Scotland until March 27th 2016. Many people will be groaning at the very thought of that, pulling their duvets up around their heads and hibernating for the next 5 months. Not me! We have entered my favourite time of year and I keep getting ideas for delicious recipes for the Bake With Bree blog. There are too many to name!

When I think of Halloween and Bonfire night I think of Hot Chocolate, toasted marshmallows, Space Dust, Pumpkin Pie and eating crispy skinned baked potatoes from tinfoil. But nothing beats the crunch of a toffee apple on a crisp Autumnal evening while  watching fireworks bursting in the night sky.

"Nothing is more scary than Halloween without Toffee Apples"

I have literally hundreds of Toffee Apple recipe ideas but I thought it would be nice to do one I hadn't tried before. I had a basic idea for baked doughnuts which involved using vanilla yoghurt but I thought I could tweak the recipe, using Apple Sauce as a substitute for the yoghurt. 

I can honestly say my Yum Yums turned out to be the tastiest cakes I have made in ages. I have put a big asterisk beside the recipe which, like all my recipes,  I have written into my Bake With Bree journal. 


This is to remind me to MAKE THESE AGAIN. Not that I need much reminding! I just had one of these little beauties with my mid morning coffee. A naughty little 'elevenses' treat...even though, as a result of the clocks being put back an hour, it is really only 10am. Oh well, you only live once.


These are so moist and sweet. The sharp apple filling compliments the sweet toffee glaze, which seems to have soaked into the sponge overnight, making it even more delicious the second day round. All the flavours of Halloween are in there, including a distinct taste of Puff Candy. I honestly can't rate these highly enough.

Here's what you'll need to make them:

Ingredients for the cakes

150g of self-raising flour
1 teaspoon of baking powder
1 teaspoon of bicarbonate of soda
A pinch of salt
1 egg (beaten)
120g of apple sauce
50g of Creme Fraiche
1 tablespoon of vegetable oil
The juice of half a lemon
3 tablespoons of Maple Syrup

For the toffee glaze icing

200g of icing sugar
2 tablespoons of toffee syrup 
4 tablespoons of milk


Preheat your oven to 180oC


Weigh out 150g of self-raising flour.


Add 1 teaspoon each of these and a pinch of salt.


Now, in a separate bowl, combine all the wet ingredients - the beaten egg, the apple sauce (I found a tasty jar in the sauce aisle of the supermarket but you could make your own stewed apples if you'd prefer), the Creme Fraiche, the oil, the lemon juice and the maple syrup.


Whisk it all together...


..until it resembles pancake batter.


Now make a well in the centre of the flour mixture...

 
 ...and add the batter mix.


Fold it in until everything is combined. The mixture should look airy and fluffy when it's ready, a bit like porridge.

Full of little bubbles.
Grease a six holed doughnut tray. I thought about using a simple muffin tray but then had the genius brainwave that the doughnut baking tin would create the perfect hole in the centre of the cakes in which to put the apple filling. 

Fill each of the holes in the tray with the batter mix. Like this...
 
I had the perfect amount of mixture for six large cakes

Bake at 180oC.

These don't take long to bake. I started off with the timer set at 10 minutes. I turned the tray 180 degrees halfway through as my oven is hotter at the back and I like to get an even bake. 

I took the Yum Yums out after ten minutes. They were baked and golden brown on top but still needed further cooking. So I flipped them out onto a flat baking tray and popped them back into the hot oven for a further 8 minutes (again turning the tray halfway).

See the hole in the centre? Perfect!!

By now the kitchen smelled divine and my tummy was rumbling. But I had to be patient. The Yum Yums had to cool before I could glaze them. Using a teaspoon I dropped a little apple sauce into the centre of each of the cakes, pressing it down with the back of the spoon.


Now I prepared the toffee glaze.

Three ingredients create a topping to die for
 
In a large bowl...


Weigh out 200g of icing sugar.


Add 4 tablespoons of toffee sauce. I used Askey's which I found in the ice-cream/dessert aisle of the supermarket. You could use honey if you want.


Add 4 tablespoons of milk. 

If you look closely you will see a little Halloween ghost in my picture. See him? Don't worry, he's friendly :)


Stir everything together until smooth and lump free. It should be quite runny. Remember this is a glaze and not a thick icing.


My advice for the final stage of decorating would be to slide a sheet of tinfoil underneath the cooling rack. The process of glazing the cakes is rather messy and having the tinfoil there will save a huge amount of cleaning up.


Prepare the Halloween/Bonfire night decorations. I used Honeycomb pieces, Butterscotch pieces and mini fudge cubes.


Drizzle the glaze over the tops of the cakes, allowing it to run down the sides. The messier the better.

Scatter the decorations over the top.


Put the cakes in the fridge to harden. 

Enjoy!


Happy Halloween!


Cut in half to reveal the moist apple centre. Perfect with the crunchy honeycomb


My next post (which I'll put up here on Friday 30th October) will include some basic Halloween goodies. I'll be dishing them out to the local kids who come round guising (that's the Scottish version of Trick or Treat). My treats will be simple and won't involve any baking. They're fun and tasty which is perfect for Halloween. 

Stay tuned!