Showing posts with label toffee. Show all posts

Sunday, 25 October 2015

Toffee Apple Yum Yums


A recipe inspired by Sandy's toffee apple in Bree McCready and the Realm of the Lost

The clocks went back last night. British Summer is officially over, although it has felt that way for some time now. We won't see lighter nights again in Scotland until March 27th 2016. Many people will be groaning at the very thought of that, pulling their duvets up around their heads and hibernating for the next 5 months. Not me! We have entered my favourite time of year and I keep getting ideas for delicious recipes for the Bake With Bree blog. There are too many to name!

When I think of Halloween and Bonfire night I think of Hot Chocolate, toasted marshmallows, Space Dust, Pumpkin Pie and eating crispy skinned baked potatoes from tinfoil. But nothing beats the crunch of a toffee apple on a crisp Autumnal evening while  watching fireworks bursting in the night sky.

"Nothing is more scary than Halloween without Toffee Apples"

I have literally hundreds of Toffee Apple recipe ideas but I thought it would be nice to do one I hadn't tried before. I had a basic idea for baked doughnuts which involved using vanilla yoghurt but I thought I could tweak the recipe, using Apple Sauce as a substitute for the yoghurt. 

I can honestly say my Yum Yums turned out to be the tastiest cakes I have made in ages. I have put a big asterisk beside the recipe which, like all my recipes,  I have written into my Bake With Bree journal. 


This is to remind me to MAKE THESE AGAIN. Not that I need much reminding! I just had one of these little beauties with my mid morning coffee. A naughty little 'elevenses' treat...even though, as a result of the clocks being put back an hour, it is really only 10am. Oh well, you only live once.


These are so moist and sweet. The sharp apple filling compliments the sweet toffee glaze, which seems to have soaked into the sponge overnight, making it even more delicious the second day round. All the flavours of Halloween are in there, including a distinct taste of Puff Candy. I honestly can't rate these highly enough.

Here's what you'll need to make them:

Ingredients for the cakes

150g of self-raising flour
1 teaspoon of baking powder
1 teaspoon of bicarbonate of soda
A pinch of salt
1 egg (beaten)
120g of apple sauce
50g of Creme Fraiche
1 tablespoon of vegetable oil
The juice of half a lemon
3 tablespoons of Maple Syrup

For the toffee glaze icing

200g of icing sugar
2 tablespoons of toffee syrup 
4 tablespoons of milk


Preheat your oven to 180oC


Weigh out 150g of self-raising flour.


Add 1 teaspoon each of these and a pinch of salt.


Now, in a separate bowl, combine all the wet ingredients - the beaten egg, the apple sauce (I found a tasty jar in the sauce aisle of the supermarket but you could make your own stewed apples if you'd prefer), the Creme Fraiche, the oil, the lemon juice and the maple syrup.


Whisk it all together...


..until it resembles pancake batter.


Now make a well in the centre of the flour mixture...

 
 ...and add the batter mix.


Fold it in until everything is combined. The mixture should look airy and fluffy when it's ready, a bit like porridge.

Full of little bubbles.
Grease a six holed doughnut tray. I thought about using a simple muffin tray but then had the genius brainwave that the doughnut baking tin would create the perfect hole in the centre of the cakes in which to put the apple filling. 

Fill each of the holes in the tray with the batter mix. Like this...
 
I had the perfect amount of mixture for six large cakes

Bake at 180oC.

These don't take long to bake. I started off with the timer set at 10 minutes. I turned the tray 180 degrees halfway through as my oven is hotter at the back and I like to get an even bake. 

I took the Yum Yums out after ten minutes. They were baked and golden brown on top but still needed further cooking. So I flipped them out onto a flat baking tray and popped them back into the hot oven for a further 8 minutes (again turning the tray halfway).

See the hole in the centre? Perfect!!

By now the kitchen smelled divine and my tummy was rumbling. But I had to be patient. The Yum Yums had to cool before I could glaze them. Using a teaspoon I dropped a little apple sauce into the centre of each of the cakes, pressing it down with the back of the spoon.


Now I prepared the toffee glaze.

Three ingredients create a topping to die for
 
In a large bowl...


Weigh out 200g of icing sugar.


Add 4 tablespoons of toffee sauce. I used Askey's which I found in the ice-cream/dessert aisle of the supermarket. You could use honey if you want.


Add 4 tablespoons of milk. 

If you look closely you will see a little Halloween ghost in my picture. See him? Don't worry, he's friendly :)


Stir everything together until smooth and lump free. It should be quite runny. Remember this is a glaze and not a thick icing.


My advice for the final stage of decorating would be to slide a sheet of tinfoil underneath the cooling rack. The process of glazing the cakes is rather messy and having the tinfoil there will save a huge amount of cleaning up.


Prepare the Halloween/Bonfire night decorations. I used Honeycomb pieces, Butterscotch pieces and mini fudge cubes.


Drizzle the glaze over the tops of the cakes, allowing it to run down the sides. The messier the better.

Scatter the decorations over the top.


Put the cakes in the fridge to harden. 

Enjoy!


Happy Halloween!


Cut in half to reveal the moist apple centre. Perfect with the crunchy honeycomb


My next post (which I'll put up here on Friday 30th October) will include some basic Halloween goodies. I'll be dishing them out to the local kids who come round guising (that's the Scottish version of Trick or Treat). My treats will be simple and won't involve any baking. They're fun and tasty which is perfect for Halloween. 

Stay tuned!


Wednesday, 14 October 2015

Ice-Cream Dream Delight

A recipe inspired by The Dreaming Hour


"You must be dreaming with open eyes,
Take what you wish but please be wise.
Some dreams are sweet but soon turn sour,
Be careful in this Dreaming Hour."

White walls reflected the shimmering light from the tiny candles on countless chandeliers. Beneath them, banqueting tables stood laden with food. There were sweet pastries, ice-cream sodas, butterscotch sundaes, fondant fancies and marzipan bonbons shaped into miniature pieces of fruit. In the centre of the room was an overflowing chocolate fountain. 
"Is it just me," said Honey, "or is this weird?"
"Weird? This my dream from last night!" laughed Sandy..."We can do anything we like! For an hour, I suppose."
 
So, what would you do if you were free to do anything for an hour? No consequences, no repercussions. It's an interesting question and one which I've asked in my workshops with children over the years. The answers are varied, interesting and thought-provoking and quite surprisingly they often include food!

My Ice-Cream Dream Delight (the title was given by my son because the ingredients include Angel Delight and Dream Topping - clever, huh?) is the stuff that dreams are made of. It's fluffy and sweet and kind of feels like swallowing pink clouds. My first mouthful took me right back to my childhood when I suddenly remembered these...


People of a certain age will now be going, "Aah, yes!" 

The filling for this cake is half cheesecake, half mousse and tastes very similar to these little blasts from the past. Once taken out of the freezer the pink whipped filling melts fairly quickly into a delicious, soft, creamy texture. The crispy, chewy base gives a bit of bite and compliments the strawberry mousse perfectly. On reflection, I thought you might substitute the strawberry Angel Delight for any flavour. Butterscotch! That was always my favourite. And the chocolate kind would probably resemble another 80's ice lolly...

Chocolate Mini Milks! A walk down memory lane today :)
Play around with this recipe. You can add anything you like to the filling. Chop some strawberries and add them to the mix or some chocolate chips for a spotty effect. It's up to you.

Here's what you'll need to make my recipe. Have fun licking the bowl!


 Ingredients
 For the crispy base:

20g butter
3 Chomp bars (approx 70g)
40g Marshmallows 
2 tablespoons of syrup
30g of milk chocolate chips
100g of Coco Pops

For the fluffy filling:

120g of cream cheese
200g of condensed milk
3 fluid ounces of strawberry syrup (from tinned strawberries)
1 packet of strawberry Angel Delight
1 packet of Dream Topping 
Milk

Before I started on the cake, Junior and I got busy making some decorations. What could be more dreamlike than gooey marshmallows and glitter? We selected an equal number of pink and white to go around the outside of the finished cake. I melted a small amount of white chocolate and a small amount of pink (I bought Pink Candy Drops from Lakeland but you can just as easily add a few drops of pink food colouring to the melted white chocolate). I topped the wide end of each marshmallow with chocolate and Junior got busy dipping them in edible glitter and shredded coconut. This is what they looked like when we'd finished...

Like little Fairy mushrooms :)


It was nice team work and the reward was to lick the bowl. Smiles all round. 

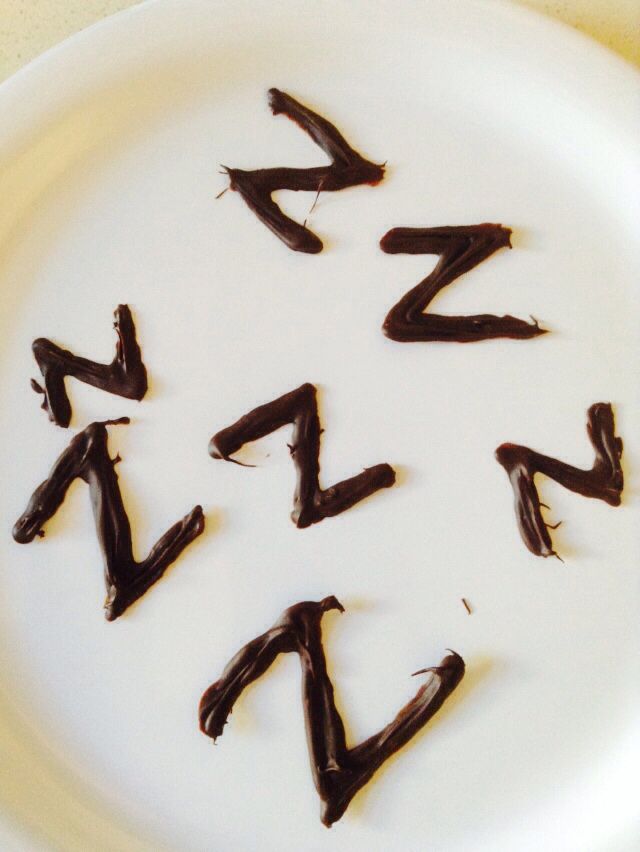
I also thought it would be a nice idea to continue with the 'dream' theme and make some dark chocolate 'Zzzz's' These were quite easy to do. I simply melted some dark chocolate, prepared a sheet of greaseproof paper then, using a chopstick as a pencil, I carefully 'wrote' some different sized letter Z's onto the paper and let them set. 


I put all these little beauties in the fridge to harden while I got busy preparing the chocolate crispy base for the cake.


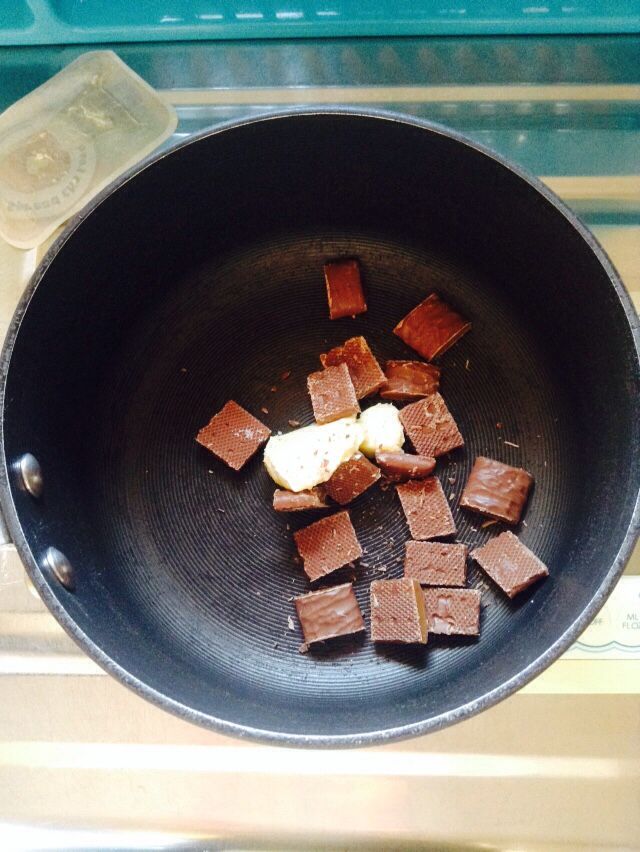
In a large saucepan add 20g butter...


Three Chomp Bars, chopped up...


40g of Marshmallows...


Melt everything on a low heat until smooth and glossy...


Add the 100g of Coco Pops.
Junior helped with this.


Stir well until the Coco Pops are covered in the sticky toffee mixture.


Transfer the crispy mixture into a greased springform baking tin and press down well so the base is completely covered. Like this...


Pop into the fridge to chill while you prepare the filling.


Drain the syrup from a tin of strawberries. Reserve 3 fluid ounces...


Weigh out 120g of cream cheese. I used full fat Philadelphia.


To this add 200g of condensed milk...


...and the strawberry syrup.


Beat these together with an electric whisk until light and fluffy.


Now it's time to prepare these.

Sprinkle the contents of the Dream Topping packet into the whisked Angel Delight and beat for another minute, until everything thickens. Fold the Dream Delight mixture into the cream cheese mixture...


Now spread this over the crispy base which should have set nicely by now.


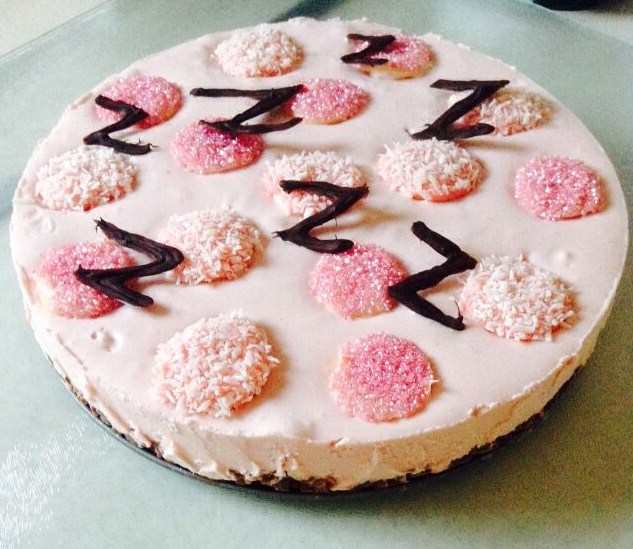
While the filling is still soft and wobbly, carefully place the decorated marshmallows on top, pressing them lightly so they submerge a little. Scatter the chocolate Z's evenly.


Pop the cake into the freezer. Try and keep the tin as flat as possible during the freezing process. Allow to freeze until hard.


When it's time to serve up the Ice-Cream Dream Delight remove it from the tin and let it thaw at room temperature for around 10 minutes. Cut and serve. Yum!


s


So, did it get the 'thumbs up' from my Head Taste Tester?

You betcha it did!

Bree McCready and the Half Heart Locket is available to buy here.

Until next time, follow your dreams. They know the way. X