Friday, 10 July 2015

Madeleine's Chocolate Tiffin

A recipe inspired by Madeleine McCready
Bree's mother has not had it easy. Widowed at an early age, she has raised her daughter alone on a neglected housing estate and has struggled to move on from the love of her life, Richard McCready. She has "worn her grief like a cloak for so long". She is a loving mum, taking Sandy and Honey under her wing, happy that Bree has two amazing friends. Flat 8B on the Rockwell estate is a warm, happy place to be, a safe and loving home. The front door is always open. Madeleine tries her best to hide her feelings but even Bree can see that there's a "sadness beneath Madeleine's polished surface".  This quote sums Mrs M up nicely.


I came across a song called "Madeleine" by The Backstreet Boys last night and it sent shivers up my spine. I had never heard it before and yet it could easily have been written especially for Madeleine McCready. 

"Madeleine, what's up with those tears in your eyes? What happened when you shut down and all the amber lights turned to red?...Outside you see the dark woods but you don't know there's fields of gold ahead. Hold on, so let go...Rise up, Madeleine, the sun will come out again...Rise up and live again, cause only you can, Madeleine..."

Madeleine deserves some happiness and that is what she shall have. That is one of the nicest things about being a writer, being able to give someone a happy ending. Nice things are coming for Madeleine McCready. There are 'fields of gold ahead' but I guess you'll have to read the stories to see what they are :)

The song is so perfect that I used it for this Flipagram. Click on Madeleine's name to view it.

Madeleine
Madeleine loves to feed the children! It's her way of showing love. Her baking is a particular favourite with Sandy who has an insatiable appetite! From her Homemade Lemonade to her Spicy Apple Squares, flat 8B always smells homely and delicious.
My favourite Mrs M recipe is Chocolate Tiffin, which is mentioned in Chapter 2 of Bree McCready and the Half Heart Locket.
 

"Madeleine clapped her hands together like an excited child and Bree tugged on the chain until the locket popped out from under her collar. Madeleine swooned, her hand on her chest.
'Oh a half-heart locket - how romantic! Your father gave me one just like it.'
She dreamily touched her neck and stared off across the room at something only she could see.
'But I could never bring myself to wear it after he died.'
She snapped back to the present and blinked away the tears that started to form in her large blue eyes. 'Well, one broken heart was enough.'
Madeleine smiled sadly at her daughter, and ruffled Bree's hair affectionately.
'Tell you what,' she went on. 'As tomorrow is your last day before the school holidays, how would you both like to come home and help me decorate the tree?'
'That would be great, Mrs M!' laughed Sandy with wide-eyed enthusiasm.
Bree shot him a sideways glance. She was going to need a bit more encouragement.
'We can have homemade chocolate tiffin,' Madeleine sang. 'And warm milk. Come on, Bree, it'll get us feeling festive.'
'You're right,' Bree grinned. 'And I can't think of two other people I'd rather be with tonight.'"

Madeleine's Chocolate Tiffin is super rich and mega tasty and because it's easy to make that makes it a great last minute birthday gift idea or a treat for unexpected guests. Here is how you make it:

Ingredients
250g of Digestive biscuits (125g of plain and 125g of chocolate)
150g of raisins
50g of chopped hazelnuts (optional)
130g butter
25g of brown sugar
3 heaped tablespoons of hot chocolate powder
2-3 drops of vanilla essence
4 tablespoons of golden syrup (60ml)
40g of mini marshmallows
250g of milk chocolate and decorations for the topping

 Put the biscuits in a large plastic back that seals along the top. Make sure as much air is out of the bag as possible then SMASH the biscuits using a rolling pin. It's up to you how fine or crunchy the texture is. I prefer a few little lumps as it makes the texture more interesting.

Whacking the biscuits is great if you're in a bad mood :)


Put the crushed biscuits into a bowl with the raisins and nuts then melt the butter, sugar, chocolate powder, vanilla essence and syrup over a low heat until it looks like this:


Mmm, gooey.

Combine the sticky mixture with the dry biscuits and raisins and stir until everything is well coated. Leave for a few moments to cool before adding the mini marshmallows. If you add them too soon they will simply melt and you won't get the desired effect.

Grease a square baking tin with butter then line it with parchment paper. This will make it easier to remove the traybake at the end. Transfer the mixture into the tray and press down well. I like to use a potato masher for this as it squishes everything down and gives a nice level top.

Chill in the fridge while you melt the chocolate for the topping. I do this over a simmering pan of water but you can use the microwave if you prefer.


Once the chocolate has melted, cover the set Tiffin evenly and decorate. I used mixed crispy chocolate balls but anything would be lovely. Edible gold glitter looks stunning for special occasions.

Once the entire traybake has set firmly it should be easy to lift out of the tray using the parchment paper. Cut into small squares. This recipe is so rich you only really require a tiny piece to satisfy your sweet craving. 

 
I've never had anything but fantastic comments about this chocolate delight
Give it a go and enjoy!


Wednesday, 8 July 2015

Bustopher Biscuit Bites

A recipe inspired by Bree's zany cat, Bustopher.
'Biscuit, caramel and chocolate. The paw-fect trio!'

As the world's greatest lover of cats it only seemed fitting that I should include a cat in the Bree McCready stories. That cat comes in the shape of Bustopher, a "dippy, cross-eyed cat with a penchant for eating spiders". 

Actually, there are another 93 cats who live in a small white cottage in the woods but that's a whole other story! Bustopher makes an appearance in all three of the books and even becomes a furry hero in one of them - I'm not saying which one and how he saves the day. That's for you to find out for yourself ;)

We first meet Bree's pet in Bree McCready and the Half Heart Locket, book 1 in the trilogy:

"Bustopher slept contently on Bree's bed, occasionally letting out small, regular snores to remind them he was there. As she rubbed his silky ears Bree found herself wondering what would become of Agora Burton's cats. Bustopher yawned and stretched out his paws until his body vibrated with pleasure. Watching him sleep always relaxed her and now his hypnotic purr, combined with the soft light from the doll's house, made her eyelids heavy."

Bustopher Biscuit Bites are simple to make and very tasty. Once you crack through the chocolate lid with your teeth there's a soft, sticky caramel underneath, sweet jam and a crunchy biscuit bottom. You can decorate them any way you like - Cola laces for whiskers would be good but I used writing icing. I'll explain more about how I made Bustopher's face later.

Before you begin, click below the picture to see a fun Flipagram of my Bustopher Biscuit Bites :)

CLICK HERE - "What's New Pussycat?"
 
So, here are the ingredients you will need to make approximately 20 biscuits -


20 Hobnob biscuits (keep some spare in case of breakage)
100g of strawberry Jam - I used the kind you can easily squirt
75 ml of double cream
3 Mars Bars (chilled and finely chopped)
100g each of milk chocolate and white chocolate
A variety of decorations

Preheat the oven to 160C.

Using a fairy cake baking tin, place the Hobnobs upside down over the holes. They should sit nicely on the top. A muffin tin would be too deep for this.


Bake for around 3 minutes until the biscuits are warm and pliable. Keep an eye on them as they can quickly burn.

Remove them from the oven and gently press them down into the holes to form cup shapes. 


Take your time as they are fragile and can easily break. It's best to do this as quickly as you can before they harden again. You might like to use the back of a dessertspoon for this, or a clean tea towel.

Leave the cup-shaped Hobnobs to cool for 10 minutes then squirt some strawberry jam into each biscuit cup and set aside.


Meanwhile combine the cream and finely chopped Mars Bars in a saucepan and place over a low heat.


Cook, stirring for 5 minutes, then whisk until smooth. 


Transfer to a mixing bowl and allow to cool and thicken for 5 minutes.

Spoon the mixture into each biscuit cup and set aside while you prepare the chocolate.


Melt the milk chocolate and the white chocolate separately. 


It's up to you whether you use the microwave for this or the old fashioned way, which I prefer - place the broken chocolate into a bowl over a simmering pan of water. Be careful not to let any water touch the chocolate or the base of the bowl as this will spoil it.


Spoon the melted chocolate over the caramel filled cups, spreading as close to the edges as you can to create a lid.


Chill until the chocolate sets.

Meanwhile gather together the decorations to make Bustopher's face.

Ears - chocolate hearts with the top sliced off to create a perfect triangle. Tiny pink candy hearts for the inside of the ear. I also used jelly diamonds cut in half and stuck them on using writing icing.
Eyes - White chocolate buttons, green Smarties and little chocolate balls and sprinkles.
Nose - A pink Smartie.
Whiskers and Mouth - Chocolate writing icing and a pink candy heart.


Bustopher's paw was made using one Marshmallow heart and four pink mini marshmallows. I also used white and milk Chocolate Buttons, chocolate balls and chocolate chips to make paw decorations.


My own personal taste tester 


I hope you enjoy my Bustopher Biscuit Bites and they leave you feline great :)

Love and sticky fingers,
Hazel X

Tuesday, 7 July 2015


Many thanks to my son who used his own pocket money to buy me this fitting tribute for my favourite room of the house. It will take pride of place in any kitchen I ever own.

Love you, Junior.

X

Friday, 3 July 2015

The Benefits of Baking

Children benefit from baking in many ways. When you spend a little time making pizza from scratch or decorating cupcakes it's not only memories you're building. You're also building confidence and creativity, teaching them science, laying down some basic maths and reading skills, giving them a sense of control & accomplishment, enhancing vocabulary, fostering social & important life skills and providing them with an important introduction to health & safety. 

I like to break down the benefits of baking into seven points.

Physical Development


Develop fine motor skills - cutting, rolling, kneading, dipping.

Hand-eye co-ordination - pouring, weighing, transferring.

Develop and strengthen larger muscles.

Using senses - tastes, textures, smells and sounds. 


Reading and Language Development


Become familiar with the names of ingredients, food groups, equipment and baking terminology.

Describing tastes and textures can enrich vocabulary.

Listening to instructions and developing conversational skills.

Using reading skills to follow a recipe/read labels. An awareness that printed word has meaning.


Sharing thoughts, ideas and feelings with increasing fluency.

Reading a recipe from top to bottom is a linear process which reinforces the basic literacy rule.


Creative and Aesthetic Development


Talking about colours, textures, smells and tastes - bitter, sweet, salty.

Appreciate the process of creating something from scratch.

Making something delicious for others to try.

Encourages a more adventurous palate.

Learning through discovery - aesthetically exploring.

Kindles creativity and ignites the imagination.


Experiences in Science and Technology

Identifying baking equipment.

Discussing healthy eating - what is good for us and what should be eaten in moderation.

Through various processes - heating, cooling, beating, whipping - food changes and becomes ready to eat.

Questioning and experimenting.

How properties change - adding liquid to dry.


Personal, Social and Emotional Development


Taking part in a group activity, turn taking and learning to co-operate.

Builds confidence to try new things and enhances self-esteem.

Opportunity to discuss kitchen safety and hygiene.

Developing concentration, self-control and decision making skills.

Knowledge of themselves and other cultures.

Baking is an important life skill and it's FUN!


Knowledge and Appreciation of the Environment


Appreciate a wider variety of food and where it comes from - eggs, milk, wheat.

Learn to use positional words - in, over, up and down.

Learn to use directional words - "Push the rolling pin backwards and forwards".


Mathematical Experience

 
Learning the importance of accurate measuring and weighing.

Problem solving.

Understanding the abstract concept of time - "The cakes need to bake for 20 minutes".

Making predictions and comparisons.

Early concepts of size, quantity and fractions.

Extending mathematical vocabulary - heavy, light, full, empty.

Comparing, counting and classifying.


PHEW!

Who would have thought baking some cakes could be so educational and rewarding?

Love and sticky fingers, Hazel X

Wednesday, 1 July 2015

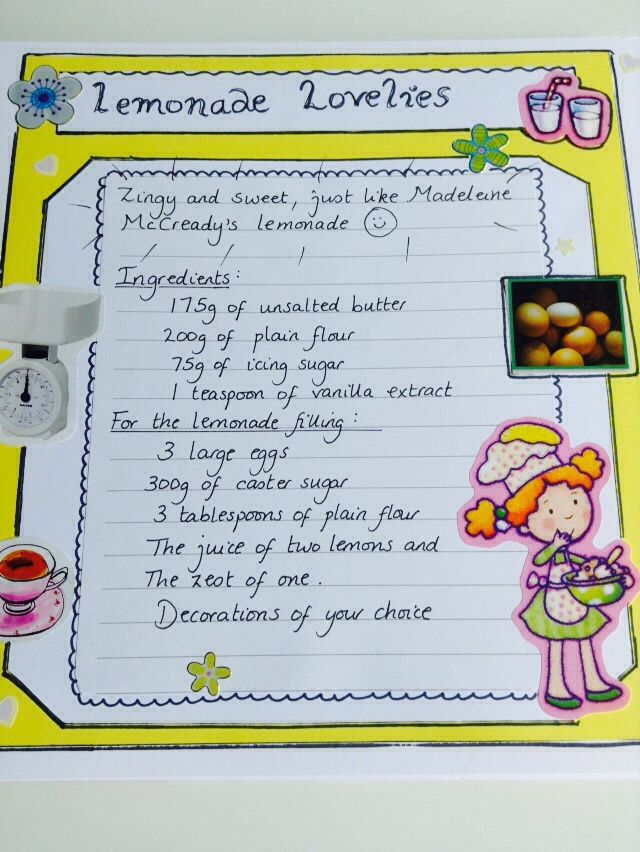
Lemonade Lovelies

 
A recipe inspired by Madeleine McCready's Homemade Lemonade.


I love the Scottish summer. It's the best day of the year by far. And as it's the first day of July, here is the perfect treat to accompany the big glowing ball of yellow that is out in all its glory.

These are my Lemonade Lovelies - sweet and zesty with a little crunch around the edges. I always feel inspired to create summery treats when I read from 'Flame of Irenus', the second book in the Bree McCready series. I love joining Bree, Sandy and Honey on the rooftop garden as they chill out 'under a high August sun' during the last summer break before they start High School.

Here's an excerpt from Chapter 1...

"Who's this pretty face?" asked Honey, pointing out a shy-looking girl in the photograph.
"That's my mum," said Bree.
"I didn't know your Mum and Dad went to school together!"
"Yes, they met at school. It was chemistry."
"Oh boy," grinned Honey. "When the chemicals kick in nothing can stop love!"
"No-they fell in love during chemistry. They had it first period on a Monday."
As if on cue, Bree's mother climbed up the ladder to the roof garden, bearing a jug of homemade lemonade. "Anyone for a top up?"
"Yes please, Mrs M." Sandy held his glass up in the air.
Madeleine laughed and climbed the last few rungs of the ladder. She wore a loose, raspberry-coloured tracksuit and had pulled her ponytail through the gap at the back of a baseball cap.
"Heavens, Sandy, don't get up. I'll come to you."
Once Sandy's glass was refilled he gave a thumbs-up to thank her. She ruffled his hair affectionately and made her way over to the girls.

So, gather together your ingredients, it's time to celebrate summer in style!

This recipe makes approximately 12 squares of lemony loveliness.

1. Preheat your oven to 180C (fan 160C) Gas Mark 4.

2. Grease and line a 21 x 31 baking tray - make it a deep one as the filling overflowed the first time I tried this recipe! Baking is a bit like life. We learn from our mistakes.

These are the ingredients you will need.


METHOD:

For the melt-in-the-mouth shortbread base -

1. Sieve the flour and icing sugar together into a large bowl and add the vanilla essence.

2. Cut the cold butter into cubes. This is not easy when your hands are summer warm so it's best to work quickly!

  
3. Add the butter to the bowl with the flour and icing sugar and rub together until the mixture resembles fine breadcrumbs. Don't worry if there is the odd lump of butter visible.

It should look a bit like this.


4. Knead everything together to form a soft dough then wrap the dough in clingfilm and refrigerate for a few minutes to let it firm. This will make it easier to handle.


Dough-ball!
  
5. Take the dough out of the fridge and carefully pat and pull it onto the base of the greased baking tray until the whole area is covered. This will take a little time to get right so be patient and don't worry about getting it perfect. As long as it's roughly covering the base and is about the same depth all over, that's all that matters. Prick all over with a fork.

6. Pop into the hot oven and bake for 20 minutes until slightly golden.

Now, I'm a very tidy cook. I hate chaos and prefer a clear work surface and minimum mess. So while the base is cooking and filling the kitchen with its sweet aroma I like to tidy things away, ready for the next step!


The Next Step - The Lemonade Filling:

1. Whisk the eggs, caster sugar, flour, lemon juice and zest until frothy. I prefer using my electric whisk for this but you can do it by hand too.

 2. Take the golden base from the oven and while it's still hot pour the lemonade mixture over the top.

3. Return to the oven for a further 25-30 minutes or until the top looks light golden brown. My advice would be to keep an eye on this as the sugary mixture can easily 'catch' and burn. 

4. Remove from the oven and leave in the tray to cool.


Don't worry about the brown bits. They add a little bit of c-r-u-n-c-h!

5. When things have cooled and the cake has firmed up it'll be easier to remove from the baking tray. Lift it out using the edges of the parchment paper and cool for another little while on a rack. 

6. Prepare your decorations! This is the fun part as you can use anything you like. I used these...


...but you could also use lemon slices, Smarties, sprinkles, lemon zest, a dusting of icing sugar...the list is endless!

7. I like to cut away the rough edges before I cut into squares. This gives a uniform appearance and gets rid of the really crispy bits. It also gives me the perfect excuse to do some taste testing!

The finished result
 

Love and sticky fingers, Hazel X

The First Day of July!

Here's a quick Flipagram I made to celebrate Summer and the start of my new blog. Enjoy!