 |
| A recipe inspired by Madeleine McCready's Homemade Lemonade. |
I love the Scottish summer. It's the best day of the year by far. And as it's the first day of July, here is the perfect treat to accompany the big glowing ball of yellow that is out in all its glory.

Here's an excerpt from Chapter 1...
"Who's this pretty face?" asked Honey, pointing out a shy-looking girl in the photograph.
"That's my mum," said Bree.
"I didn't know your Mum and Dad went to school together!"
"Yes, they met at school. It was chemistry."
"Oh boy," grinned Honey. "When the chemicals kick in nothing can stop love!"
"No-they fell in love during chemistry. They had it first period on a Monday."
As if on cue, Bree's mother climbed up the ladder to the roof garden, bearing a jug of homemade lemonade. "Anyone for a top up?"
"Yes please, Mrs M." Sandy held his glass up in the air.
Madeleine laughed and climbed the last few rungs of the ladder. She wore a loose, raspberry-coloured tracksuit and had pulled her ponytail through the gap at the back of a baseball cap.
"Heavens, Sandy, don't get up. I'll come to you."
Once Sandy's glass was refilled he gave a thumbs-up to thank her. She ruffled his hair affectionately and made her way over to the girls.
So, gather together your ingredients, it's time to celebrate summer in style!
This recipe makes approximately 12 squares of lemony loveliness.
1. Preheat your oven to 180C (fan 160C) Gas Mark 4.
2. Grease and line a 21 x 31 baking tray - make it a deep one as the filling overflowed the first time I tried this recipe! Baking is a bit like life. We learn from our mistakes.
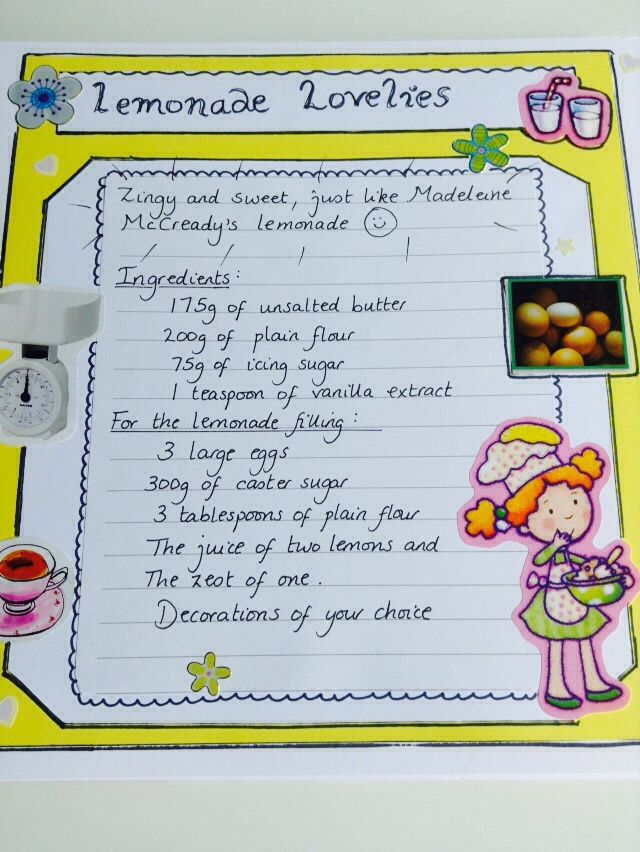 | ||
| These are the ingredients you will need. |

METHOD:
For the melt-in-the-mouth shortbread base -
1. Sieve the flour and icing sugar together into a large bowl and add the vanilla essence.
2. Cut the cold butter into cubes. This is not easy when your hands are summer warm so it's best to work quickly!

3. Add the butter to the bowl with the flour and icing sugar and rub together until the mixture resembles fine breadcrumbs. Don't worry if there is the odd lump of butter visible.

It should look a bit like this.
4. Knead everything together to form a soft dough then wrap the dough in clingfilm and refrigerate for a few minutes to let it firm. This will make it easier to handle.
 | ||||
| Dough-ball! |
5. Take the dough out of the fridge and carefully pat and pull it onto the base of the greased baking tray until the whole area is covered. This will take a little time to get right so be patient and don't worry about getting it perfect. As long as it's roughly covering the base and is about the same depth all over, that's all that matters. Prick all over with a fork.
6. Pop into the hot oven and bake for 20 minutes until slightly golden.
Now, I'm a very tidy cook. I hate chaos and prefer a clear work surface and minimum mess. So while the base is cooking and filling the kitchen with its sweet aroma I like to tidy things away, ready for the next step!

6. Pop into the hot oven and bake for 20 minutes until slightly golden.
Now, I'm a very tidy cook. I hate chaos and prefer a clear work surface and minimum mess. So while the base is cooking and filling the kitchen with its sweet aroma I like to tidy things away, ready for the next step!

The Next Step - The Lemonade Filling:
1. Whisk the eggs, caster sugar, flour, lemon juice and zest until frothy. I prefer using my electric whisk for this but you can do it by hand too.

3. Return to the oven for a further 25-30 minutes or until the top looks light golden brown. My advice would be to keep an eye on this as the sugary mixture can easily 'catch' and burn.
4. Remove from the oven and leave in the tray to cool.
 |
| Don't worry about the brown bits. They add a little bit of c-r-u-n-c-h! |
5. When things have cooled and the cake has firmed up it'll be easier to remove from the baking tray. Lift it out using the edges of the parchment paper and cool for another little while on a rack.
6. Prepare your decorations! This is the fun part as you can use anything you like. I used these...

...but you could also use lemon slices, Smarties, sprinkles, lemon zest, a dusting of icing sugar...the list is endless!
7. I like to cut away the rough edges before I cut into squares. This gives a uniform appearance and gets rid of the really crispy bits. It also gives me the perfect excuse to do some taste testing!
The finished result

Love and sticky fingers, Hazel X
No comments:
Post a Comment