Saturday, 17 October 2015

Seriously Decadent Hot Chocolate


A recipe inspired by October and the Ramthorpe Funfair
I absolutely love Autumn. It's my favourite time of year. Yes, it's colder and it's definitely getting darker but I like that. Crisp leaves, conkers, scarves and the smell of bonfires are just some of the things that make October special for me. This month always conjures up birthday excitement and cosy nights in beside the fire. October makes me feel warm inside.

I quite often get asked which of the Bree novels was my favourite to write. It's a tricky one to answer because each of the books has something special and unique about it and each one has memories attached  - how I was feeling and what I was doing at the time of writing them. But if I really had to choose I would have to say my favourite book to write was the third book, Bree McCready and the Realm of the Lost. This is partly due to the story being set during Halloween. It gave me such an opportunity to use my senses to bring the story to life.

As a writer you get pulled into the story and therefore it was a delight to experience the Ramthorpe Funfair with Bree, Sandy and Honey. It was a very visual and sensual experience which included all the things that made my own childhood so special around this time of year. Bonfires, fireworks, toffee apples, being outside with your friends after dark, making patterns in the night air with sparklers and warming chilly fingers on a cup of hot chocolate. So what would be a more fitting recipe to offer you than Hot Chocolate? And do I have the most Seriously Decadent Hot Chocolate for you! Weight watchers look away now.


It's a straightforward recipe which will give you enough for about three or four drinks. I put everything in a jar with a lid so I can use it again and again. Here's what you'll need:


6 tablespoons of Cocoa powder
6 tablespoons of milk powder (Coffee Compliment)
1 tablespoon of Caster sugar
1 sachet of Fudge flavour Cadbury's Highlights
4 tablespoons of milk chocolate chips

Marshmallows for the topping
Milk to make

Put the first five ingredients in a jar and shake well. Add three heaped teaspoons of this chocolate mix to a saucepan, add 200ml of milk and whisk over a low heat until melted, warm and frothy.

Transfer to a mug and top with marshmallows.


If you're feeling very sweet-toothed you might like to add some fudge pieces to this for an extra special twist. Now all you need is a dry, crisp evening, a roaring bonfire and some good friends to share the occasion. 

Enjoy!


"As Bree sipped her hot chocolate, hands curled round the cup, face buried in the steam, she sensed someone staring at her. A hooded figure stood perfectly still amidst the throng of activity. His hands were tucked into the sleeves of his cloak. A memory stirred at the back of her mind, but before she could pin it down the man lowered his hood to reveal a shiny, bald head. He stared at her with eyelids that showed up bright red against his chalk white skin. Black lips muttered something before he turned and walked away, melting into the crowd. Bree searched every face, but he had simply vanished into thin air."

Excerpt from chapter 1 of Bree McCready and the Realm of the Lost.

Wednesday, 14 October 2015

Ice-Cream Dream Delight

A recipe inspired by The Dreaming Hour


"You must be dreaming with open eyes,
Take what you wish but please be wise.
Some dreams are sweet but soon turn sour,
Be careful in this Dreaming Hour."

White walls reflected the shimmering light from the tiny candles on countless chandeliers. Beneath them, banqueting tables stood laden with food. There were sweet pastries, ice-cream sodas, butterscotch sundaes, fondant fancies and marzipan bonbons shaped into miniature pieces of fruit. In the centre of the room was an overflowing chocolate fountain. 
"Is it just me," said Honey, "or is this weird?"
"Weird? This my dream from last night!" laughed Sandy..."We can do anything we like! For an hour, I suppose."
 
So, what would you do if you were free to do anything for an hour? No consequences, no repercussions. It's an interesting question and one which I've asked in my workshops with children over the years. The answers are varied, interesting and thought-provoking and quite surprisingly they often include food!

My Ice-Cream Dream Delight (the title was given by my son because the ingredients include Angel Delight and Dream Topping - clever, huh?) is the stuff that dreams are made of. It's fluffy and sweet and kind of feels like swallowing pink clouds. My first mouthful took me right back to my childhood when I suddenly remembered these...


People of a certain age will now be going, "Aah, yes!" 

The filling for this cake is half cheesecake, half mousse and tastes very similar to these little blasts from the past. Once taken out of the freezer the pink whipped filling melts fairly quickly into a delicious, soft, creamy texture. The crispy, chewy base gives a bit of bite and compliments the strawberry mousse perfectly. On reflection, I thought you might substitute the strawberry Angel Delight for any flavour. Butterscotch! That was always my favourite. And the chocolate kind would probably resemble another 80's ice lolly...

Chocolate Mini Milks! A walk down memory lane today :)
Play around with this recipe. You can add anything you like to the filling. Chop some strawberries and add them to the mix or some chocolate chips for a spotty effect. It's up to you.

Here's what you'll need to make my recipe. Have fun licking the bowl!


 Ingredients
 For the crispy base:

20g butter
3 Chomp bars (approx 70g)
40g Marshmallows 
2 tablespoons of syrup
30g of milk chocolate chips
100g of Coco Pops

For the fluffy filling:

120g of cream cheese
200g of condensed milk
3 fluid ounces of strawberry syrup (from tinned strawberries)
1 packet of strawberry Angel Delight
1 packet of Dream Topping 
Milk

Before I started on the cake, Junior and I got busy making some decorations. What could be more dreamlike than gooey marshmallows and glitter? We selected an equal number of pink and white to go around the outside of the finished cake. I melted a small amount of white chocolate and a small amount of pink (I bought Pink Candy Drops from Lakeland but you can just as easily add a few drops of pink food colouring to the melted white chocolate). I topped the wide end of each marshmallow with chocolate and Junior got busy dipping them in edible glitter and shredded coconut. This is what they looked like when we'd finished...

Like little Fairy mushrooms :)


It was nice team work and the reward was to lick the bowl. Smiles all round. 

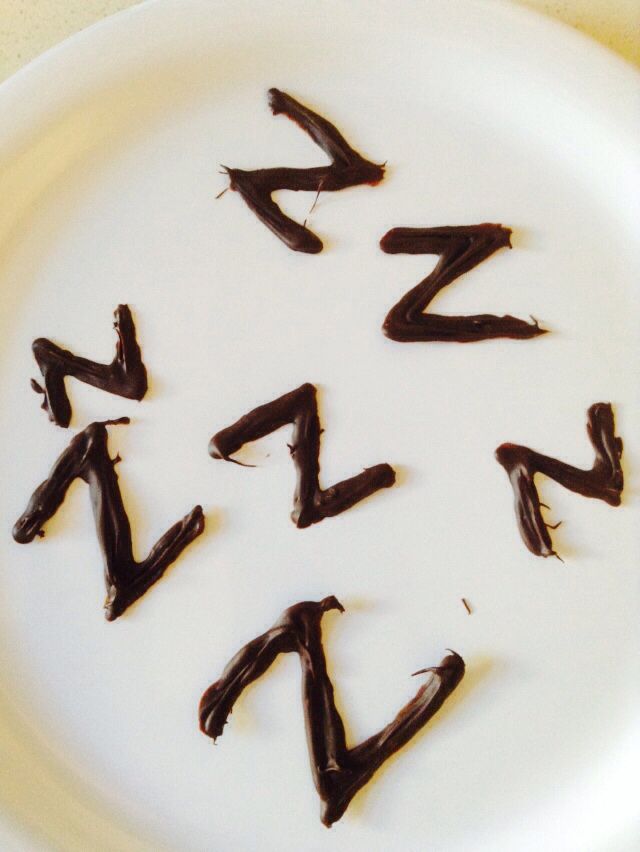
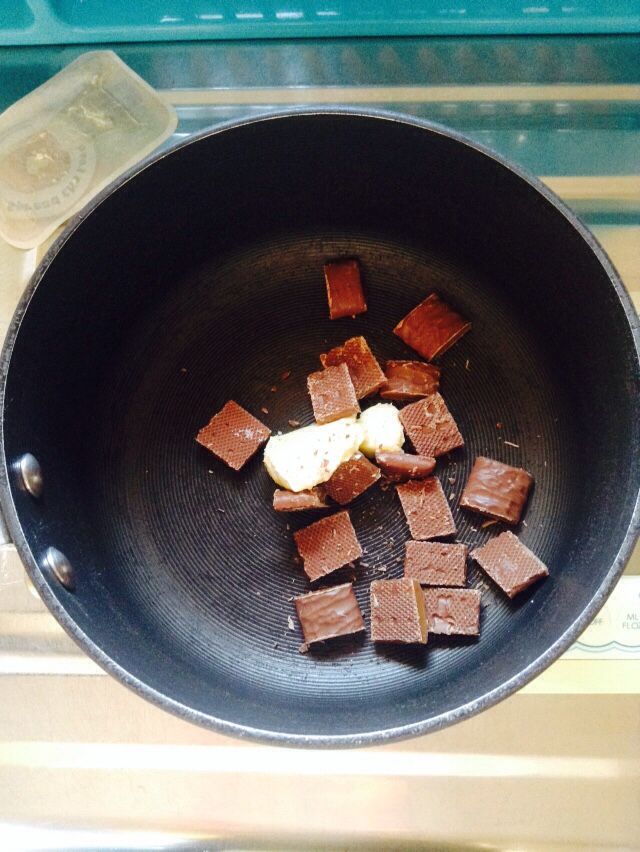
I also thought it would be a nice idea to continue with the 'dream' theme and make some dark chocolate 'Zzzz's' These were quite easy to do. I simply melted some dark chocolate, prepared a sheet of greaseproof paper then, using a chopstick as a pencil, I carefully 'wrote' some different sized letter Z's onto the paper and let them set. 


I put all these little beauties in the fridge to harden while I got busy preparing the chocolate crispy base for the cake.


In a large saucepan add 20g butter...


Three Chomp Bars, chopped up...


40g of Marshmallows...


Melt everything on a low heat until smooth and glossy...


Add the 100g of Coco Pops.
Junior helped with this.


Stir well until the Coco Pops are covered in the sticky toffee mixture.


Transfer the crispy mixture into a greased springform baking tin and press down well so the base is completely covered. Like this...


Pop into the fridge to chill while you prepare the filling.


Drain the syrup from a tin of strawberries. Reserve 3 fluid ounces...


Weigh out 120g of cream cheese. I used full fat Philadelphia.


To this add 200g of condensed milk...


...and the strawberry syrup.


Beat these together with an electric whisk until light and fluffy.


Now it's time to prepare these.

Sprinkle the contents of the Dream Topping packet into the whisked Angel Delight and beat for another minute, until everything thickens. Fold the Dream Delight mixture into the cream cheese mixture...


Now spread this over the crispy base which should have set nicely by now.


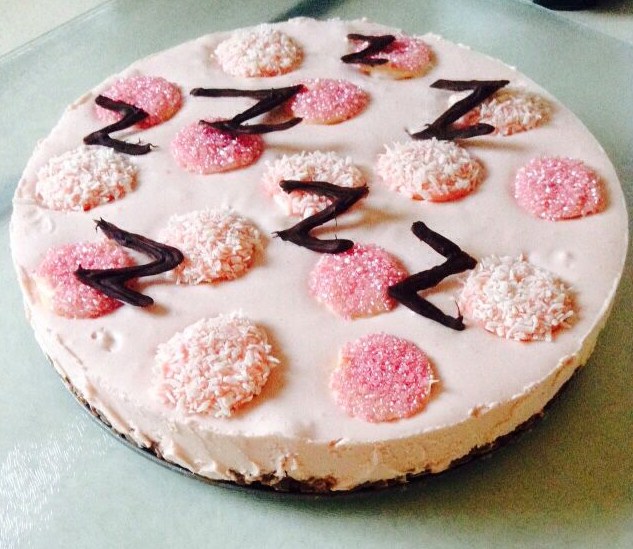
While the filling is still soft and wobbly, carefully place the decorated marshmallows on top, pressing them lightly so they submerge a little. Scatter the chocolate Z's evenly.


Pop the cake into the freezer. Try and keep the tin as flat as possible during the freezing process. Allow to freeze until hard.


When it's time to serve up the Ice-Cream Dream Delight remove it from the tin and let it thaw at room temperature for around 10 minutes. Cut and serve. Yum!


s


So, did it get the 'thumbs up' from my Head Taste Tester?

You betcha it did!

Bree McCready and the Half Heart Locket is available to buy here.

Until next time, follow your dreams. They know the way. X


Saturday, 3 October 2015

Don Daines' Magic Key Lime Pie

A recipe inspired by Don Daines' Magic Key in 'Bree McCready and the Half Heart Locket'

Tomorrow my good friends, The Galls, are hosting a coffee afternoon to raise funds for MacMillan and Marie Curie Cancer Care, two charities that provide much needed care and support for people living with terminal illness across the UK. It was because of MacMillan and Marie Curie that Neil's Mum, Alice, was able to be at home with her family during her long and courageous battle with cancer.

What better reason could there be to put my love of baking into action? I've been up since 7:30 this morning making individual pumpkin pies with cream and pecans, Malteser traybake and these little daisy decorated cupcakes:


 But it's the Key Lime Pie I'd like to focus on for this blog post. This one is for you, Alice. Here's hoping plenty of cash will be raised in your name.

The idea for this pie was inspired by a character in the first Bree McCready book. His name is Don Daines. Not many people know this but his name came from my son, who at the time of writing the novel was about 3 years old. As he was learning to talk, he often asked to "Don Daines". This was his way of asking me to "Go downstairs". And so a charater was born.

We first meet Donald Daines in Chapter 15 of Bree McCready and the Half Heart Locket. I won't give too much of the story away but the chapter is entitled Help From a Friend so that's a little clue! Here is a quick excerpt:

"Don pulled a polished silver key from the bunch at his hip and pressed it into Bree's hand. 'This should help you out of any tricky situations,' he smiled, folding her fingers around the tiny key."

And boy, does that little key come in very handy! Not just in book 1 but also in book 2 and 3! 

A while ago I saw this cute little sillicone mould online:

  
I immediately thought the middle key looked exactly how I'd imagined the magic key to look so I ordered it and got to work thinking of the perfect recipe to go with it. 

And voila! Here are the ingredients for Don Daines' Magic Key Lime Pie:

300g of Ginger Nut biscuits
100g of Lotus Biscoff biscuits
200g of unsalted butter
4 tablespoons of brown sugar
125ml of fresh lime juice (I used three LARGE limes)
2 eggs plus 2 egg yolks (so 4 eggs)
Zest of two limes
397g tin of Condensed Milk
250ml of whipping cream

Preheat your oven to 170oC.

Put the two kinds of biscuit into a strong plastic bag and WHACK with a rolling pin until broken into a very fine powder. It's probably easier to whizz them up in a food processor but where's the fun in that? There's something special about doing these things the old-fashioned way.

Prepare to be smashed!
A few minutes later
Add the crumbs and the brown sugar to a large mixing bowl and melt the butter over a low heat until liquified.


Pour the melted butter over the biscuit crumbs and coat them evenly. Transfer to a greased 22cm springform tin. Using the back of a spoon, press down firmly into the base and up the sides of the tin. Chill for 10 minutes.

Bake the base for 10 minutes or until golden brown. I noticed some drips of butter leaking out the base of the tin so I would recommend putting a roasting tin underneath while it cooks. Take it from me - it'll save a whole load of cleaning time later!

To make the filling:


Grate the zest from two large limes.


Juice three large limes or five small limes. You'll need 125ml of juice. Strain through a seive to remove pips and pith.


Whisk the eggs, extra yolks and lime zest together until light and creamy. A couple of minutes should see this done. I used an electric mixer for this.

Done.
Whisk in the condensed milk, lime juice and cream for 1 minute until combined.

Light and fluffy.
I suppose I was expecting the mixture to be green at this point as all the shop-bought Key Lime Pies I've ever tried have been highly coloured. However, as you can see, the mixture is a pale yellow. It remains this colour even after cooked. So now would be a good time to add a few drops of green food colouring if you'd prefer your finished pie to look greener. Not too much though. It's not quite Halloween yet!!

Pour the mixture into the biscuit base. I had quite a bit left over so I've frozen it in Tupperware for a later date. I'd imagine this recipe would work perfectly in little ready-made pie cases. I'll let you know. Pop into the oven for 45 minutes. Ideally it should be just set in the centre.

Cooling before chilling
 See what I mean about the colour? Smells amazing though. You can see from this picture that the bottom edge 'caught' during the final stages of baking. It shouldn't matter too much as I got to the oven just in time. And you'll see in a minute that the decoration will cover this minor flaw.

Once the pie has cooled, pop it into the fridge and chill for an hour.

I decorated my pie with Flake. Not only is this my favourite chocolate bar but it's a dream to work with as you can mash it up while it's still inside the wrapper then simply open and pour.


You might like to decorate your pie with lime slices and dollops of whipped cream instead.

I will let you know how the finished pie goes down at the Coffee Afternoon tomorrow. If you would like to donate to a great cause then click here to visit Beth's JustGiving page.